The latest versions of Windows, Mac, and Linux all have SSH capabilities built into their terminals.
In Windows, go to the Start menu and search for “PowerShell” (or “Command Prompt” – both work.
On a Mac, go to Launchpad (or do a Spotlight search with Cmd+Space) and search for “terminal.”
On Linux, it depends on which distribution, but there should be a similar application launcher you can search for “terminal” in.
Once in a terminal window, type the following:
ssh <netid>@<server>
where <netid> is your username and <server> is the name of the machine or host you are trying to connect to.
For example, if my netid was 12abc34 and I wanted to connect to linux2.caslab.queensu.ca, I would type: ssh 12abc34@linux2.caslab.queensu.ca.
If it’s your first time connecting to this host from your current device, you will be prompted to accept an encryption key. Simply type “yes” and press enter.
You will then be asked for your password. Type it in and note that nothing will appear to make it look like you have typed anything. This is normal. If you make a mistake, press backspace a bunch of times and try again.
The whole process is illustrated in the following animation (using Windows PowerShell, but it is the same on all platforms):
And that’s it. If you have any problems, please consult the FAQ or contact help@cs.queensu.ca.
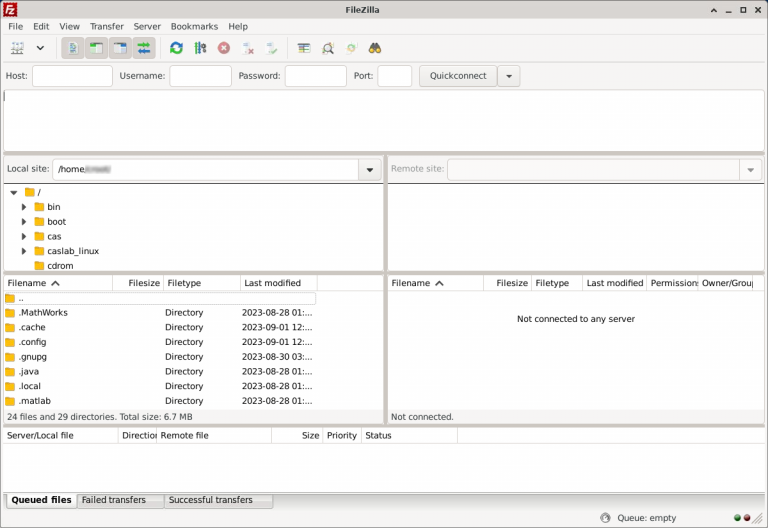
FileZilla is a cross platform FTP client. It’s older and less updated than Cyberduck (recommended), but it works. Beware of bundled adware in the free version.
Once installed and launched you’ll see a window that looks like this:
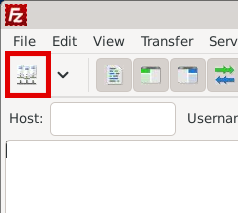
Click this icon on the top left:
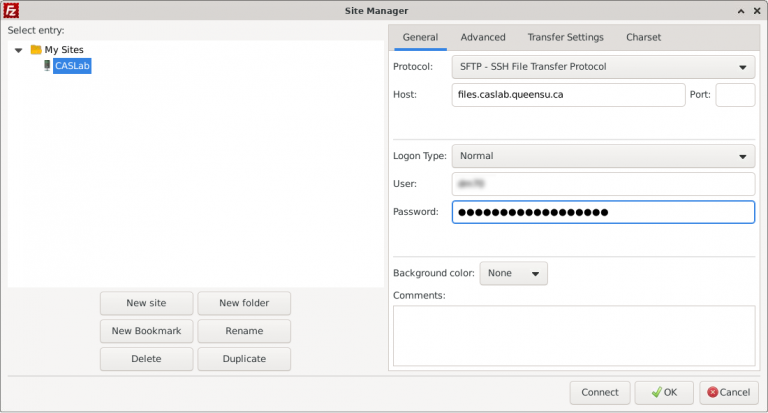
In the resulting window, click the “New Site” button. Give it a name like “CASLab” and under the “General” tab put “files.caslab.queensu.ca” are the “Host”, “22” as the “Port” and select “SFTP – SSH File Transfer Protocol” from the dropdown. Then select “Normal” as the “Logon Type” and enter you Queen’s NetID and password. Then click the “OK” button.
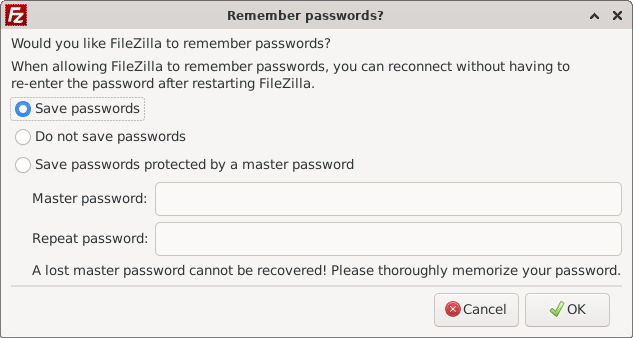
You may get a popup about remembering passwords. You can choose to save them, have it prompt each time, or set a master password for all future stored passwords.
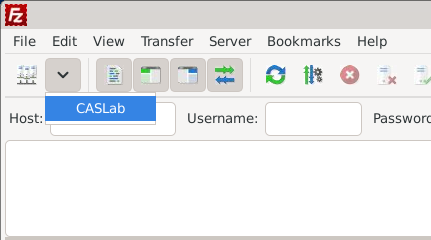
Now click the arrow next to that icon you clicked previously and select “CASLab” (or whatever you called it).
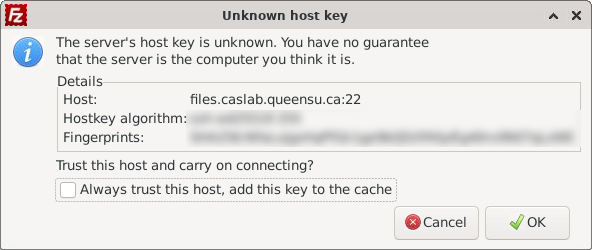
You will be prompted to accept an encryption key upon first connecting. Check “Always trust this host, add this key to the cache” (so you won’t be prompted in the future) and click the “OK” button.
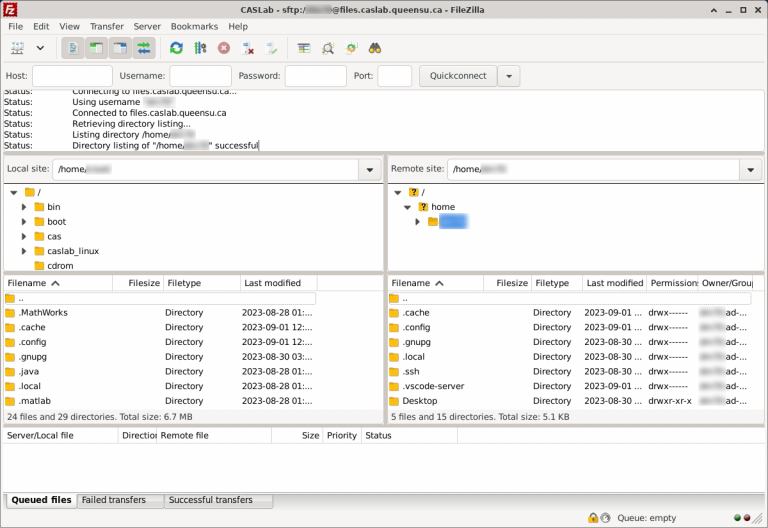
You should now see your files.
ou can drag files from the left side to the right side to copy files from your local computer to CASLab Linux and vice versa.
Microsoft’s Visual Studio Code is a popular cross-platform code editor. You can use to connect to CASLab Linux and create/open/edit files, as well as run commands through the built in terminal. This guide will show you how to set it up.
Before you can connect to CASLab Linux with VS Code, you must first install the Remote – SSH extension.
Go to the Extensions tab on the left sidebar and search for “ssh” in the text box. Find “Remote – SSH” by Microsoft from the list and click “Install.”
After installing the Remote – SSH extension, you should see a new icon appear on the sidebar:
Setting up a SSH Target
First, we have to set up a new SSH target for one of the Linux VMs. Note: Unlike in other tutorials, you won’t be able to use linux.caslab.queensu.ca, which is the VM that lets you select a particular VM. Instead, you will have to select a VM to use from the following list:
linux1.caslab.queensu.ca
linux2.caslab.queensu.ca
linux3.caslab.queensu.ca
linux4.caslab.queensu.ca
linux5.caslab.queensu.ca
linux6.caslab.queensu.ca
For the images in the rest of this guide, we will use linux1.caslab.queensu.ca, but you should pick your own VM so that everyone isn’t using the same one.
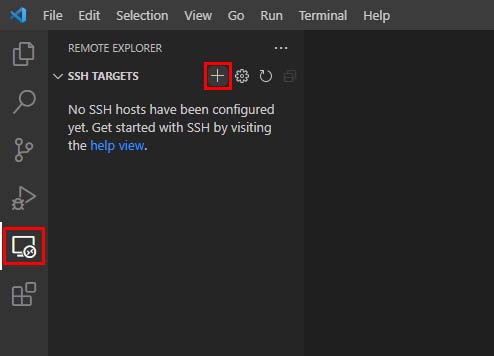
In VS Code, click on the new Remote – SSH icon in the sidebar. Hover over where it “SSH TARGETS” and click the “+” button.
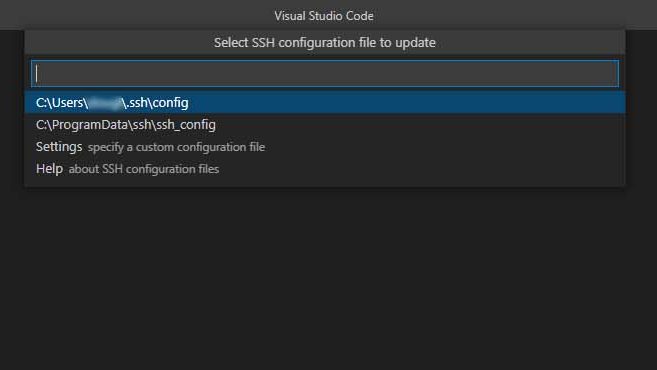
If this is your first time using the extension, you will be asked to choose the location of the configuration file. In most cases, you should pick the first option is presents. (Note actual path will differ by platform.)
The next asks for the “SSH Connection Command.” Here you will type:
where <your netid> is your netid and <linux1, linux2, … linux6> is whatever Linux VM you chose. Press Enter when you’re done.
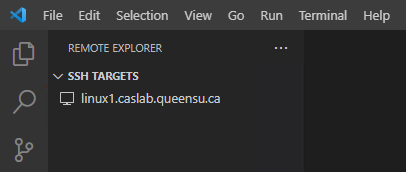
You should now see your SSH Target in the sidebar.
You may repeat these steps for more than one Linux VM should you need to use another one. (Note that your files are the same across all VMs.)
Connecting to an SSH Target
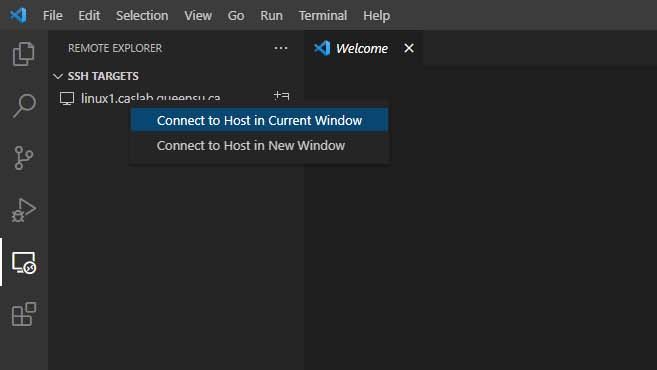
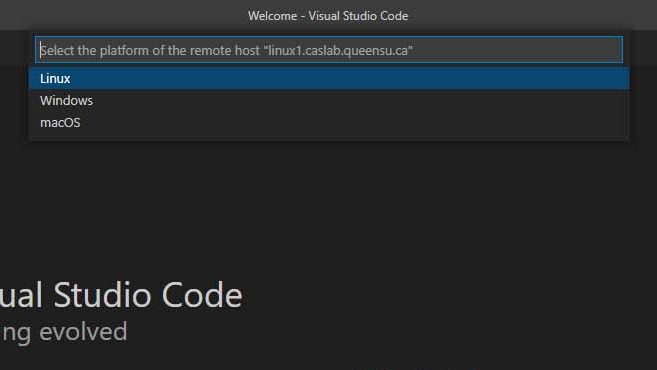
In the Remote Explorer sidebar, right click on your newly created target for your chosen Linux VM and click “Connect to Host in Current Window” (or “Connect to Host in New Window” – it doesn’t really matter).
You will be asked to select the platform of the remote host. Select “Linux” from the list.
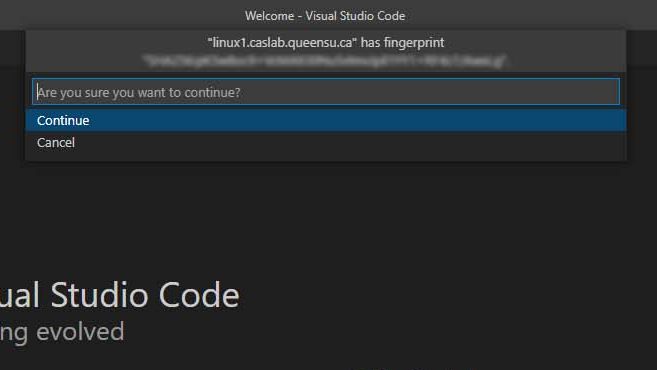
The next prompt will ask you to accept the SSH fingerprint. Select “Continue.”
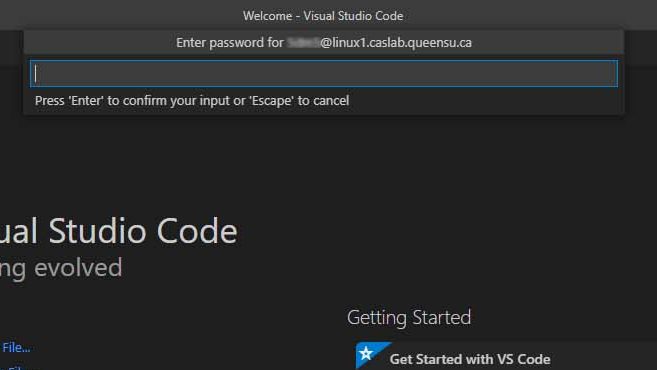
Finally, you will be asked to input your password. Input your Queen’s password and press Enter. (Note: this is the only prompt you will get after the first time connecting.)
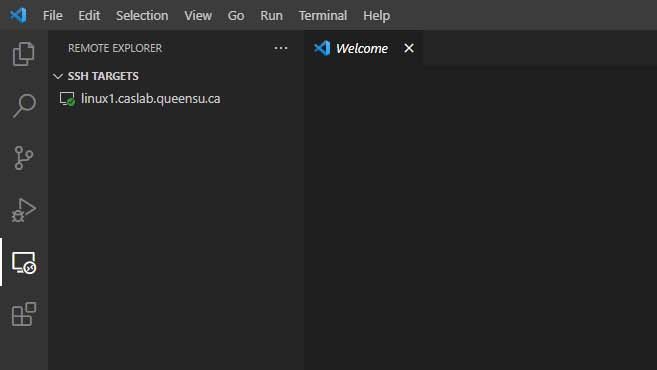
If all goes right, you should now be connected to your chosen CASLab Linux VM.
Opening Your Home Directory
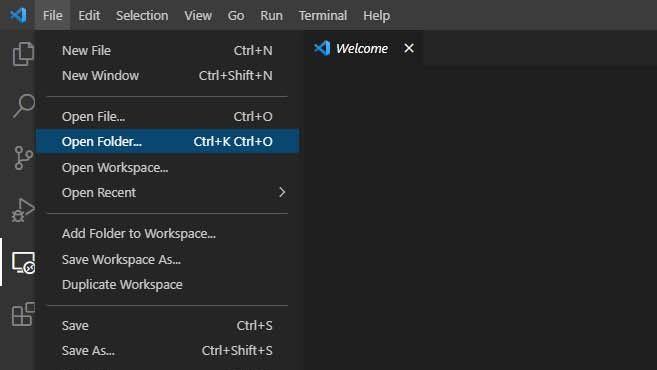
You may notice that you don’t see any files yet. First we must open your home directory. After connecting to your VM, got to File > Open Folder…
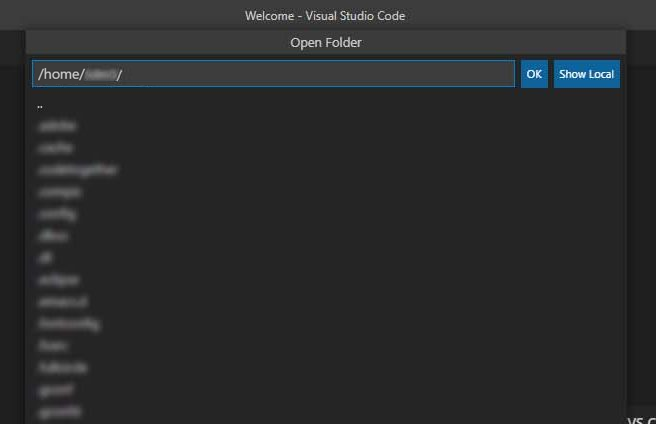
A prompt will ask you to select a folder to open on the remote server. By default this should be your home directory:
/home/<your netid>
If it’s not, enter the path above (replacing <your netid> with your netid). Then press OK or hit Enter.
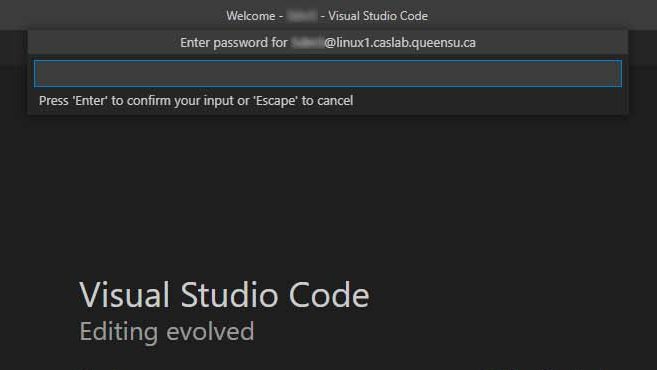
Enter your Queen’s password again.
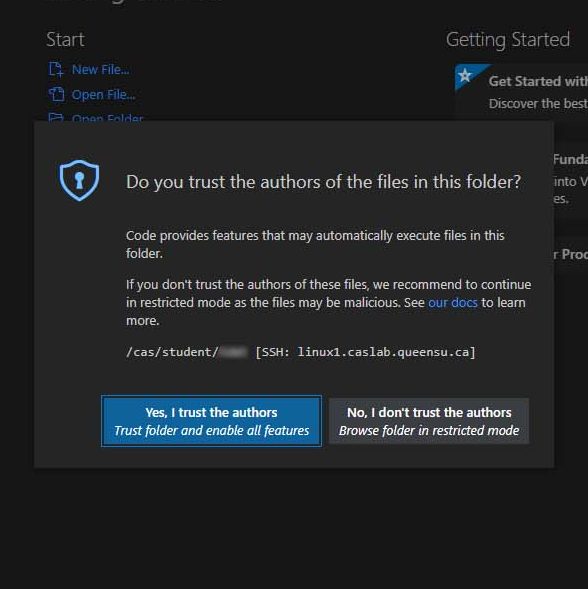
The first time you open a new folder, you will be asked it you trust the authors of the files in the folder. Click “Yes, I trust the authors.”
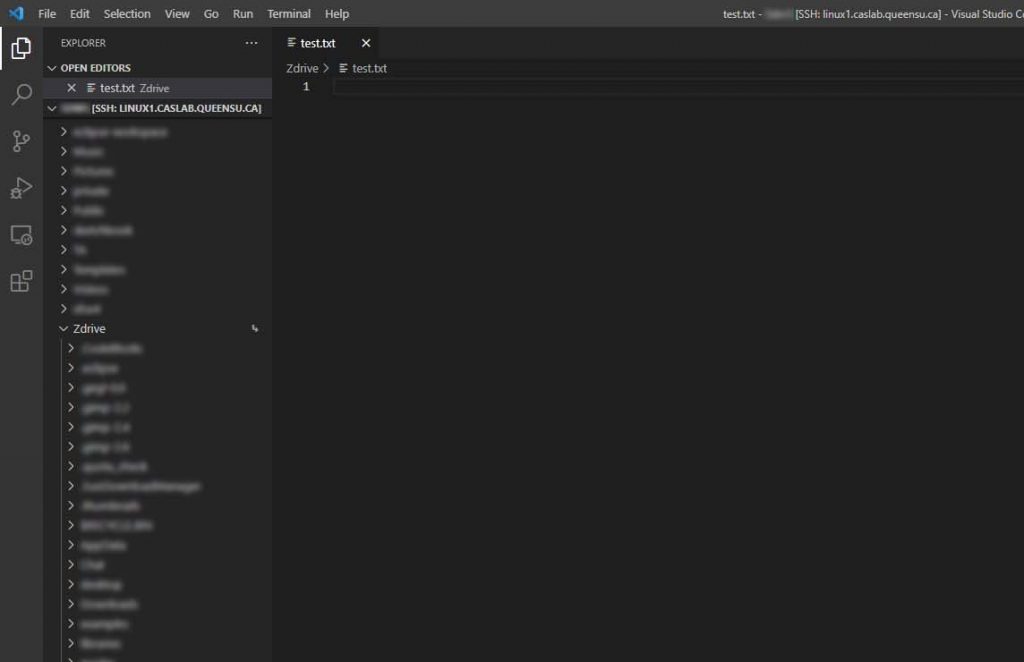
You should now see all your files in the sidebar on the left.
Opening, Editing, Creating and Uploading Files
Once you are connected and have opened your home directory, opening and editing your files is pretty straight forward. To open a file, find it in the Explorer sidebar on the left and click on it.
The file will open in the editor. From there, any changes you make will be saved directly to the file on the server when you Save the file (File > Save, or Ctrl + S).
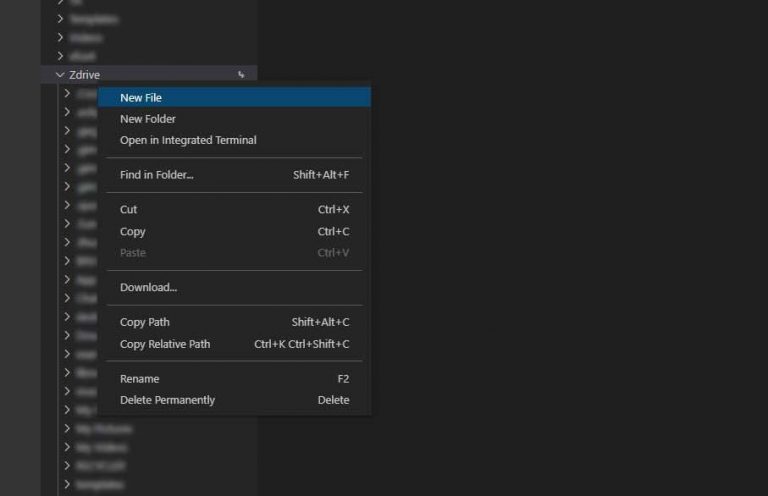
To create a new file or folder, find the place in the directory tree of the Explorer sidebar, right click where you want the file/folder to be, and click New File, or New Folder.
You can also right click on files and folders to rename then or delete them. (Note that when you delete something on the server, it is gone forever. There is no Recycle Bin, so be careful.)
You can also move files from your local computer onto CASLab by dragging and dropping them from your OS to the Explorer pane in VS Code. This will upload a copy to the server. Conversely, you can right click files in the Explorer pane and click Download… to download them to your local machine.
Running/Compiling Code on CASLab Linux
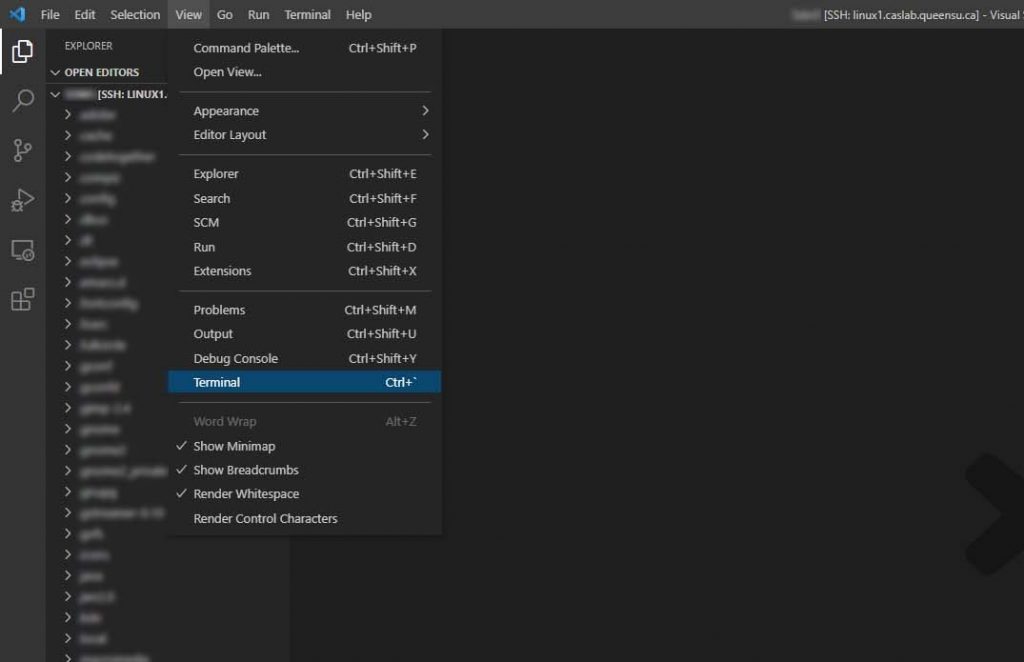
VS Code has a built-in terminal for running commands on the server. To see it, click View > Terminal.
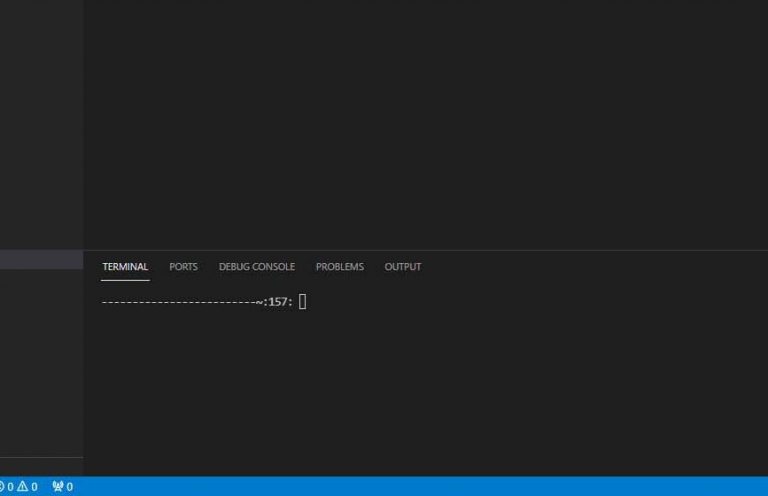
You’ll see the terminal at the bottom of the window under the editor.
From there, you can run commands on the server to compile and execute your code, without having to open a separate SSH session in another window/application. Commands for compiling and/or running your code will depend on the language you’re using. Ask your TA for help if you don’t know how to compile or run code in your language from the terminal.